Showing posts with label Monthly Interior Design Tips. Show all posts

Tuesday, March 13, 2018

Why hire an Interior Designer when you can do it yourself?

Here are 9 reasons for you to consider :


1] Learn about something new.

Fresh ideas, new perspective. Experienced interior design professionals open a window into the world of design, art, architecture.

2] Reflect your style, values and taste.

You know what you like and don't like, but not sure how to achieve these preferences in your home.  Maybe you get overwhelmed with all the details and options. Interior designers are skilled in editing, balance, scale and proportion, therefore can produce a cohesive and coherent style solution for you.

3] Another perspective.

You like a lot of different styles and not sure what is the most suitable for your home, budget or lifestyle. Interior designers are trained in the history of design, ergonomics, psychology of color, perception, architectural styles and can recommend things you may not have thought nor heard of.

4] Project planning and management.

You get excited about making positive improvements in your home, but don't want the hassle of doing all the research, planning, shopping, hiring multiple trades, etc.  Interior designers provide project planning, budgeting and project management as part of their services. They also have a team of go-to tradespeople and artisans to produce high-quality results.

5] Avoid do-it-yourself mistakes that can be costly.


6] Cost of things.

An experienced interior designer will know the cost of things right from the get-go. They will be able to assess your wish list and coach you at the very beginning what your budget will allow for. 
 

7] Treat yourself.

Life is short - enjoy it to the max by treating yourself to a one-of-a-kind custom designed room or entire home ! Similar concept to having a custom dress or suit made.

8] Technology. 

You want a more relaxing, Feng Shui environment, including equipment [e.g.a modem, router] and appliances built-in to cabinets & layouts that flow. Having an interior designer produce drawings that show how this can be achieved is paramount.

9] Develop a lasting relationship with a valued professional.

You have a hair stylist, aesthetician and personal trainer and now you want an Interior Designer as part of your lifestyle team. You value and trust professional advice in order to enjoy your life to its fullest.


Blogatchalater!

Thursday, April 13, 2017

The Cost of a Brand New Living Room

Want to start over and replace everything in your living room ? Most of us dream of doing that, especially if we've been living with the same old furniture and tchotchkes for 20 years+.
So what would it cost for a brand new living room ? What is your budget? 

In this series, I delve into the costs of redesigning, redecorating and renovating typical rooms found in design magazines.

I've realized over time that when we see images of beautiful spaces in magazines, we have no idea of the money and time that has gone into that space. 

Here is an example living room photo from Elle Decor interior design magazine and the estimated 2017 cost of all the items [mid-range price points] in Canadian dollars :


A : hardwood flooring refinishing $500 - 750
B : sectional sofa $3,000 - 6,000
C : rug $1,000 - $5,000
D : credenza $800 - 3,500
E : television + bracket  $1,000 - 2,000
F : coffee table $800 - 2,500
G : floor lamp $750 - 1,800
H : nesting tables $750 - 1,500
I : blinds [x 3 ] $1,500 -2,900
J : fine art  [36"x48"]  $1,000 - 6,000
K : pillows [x 3 ] $150 - 375
L : throw $80 - 500
M : painted focal wall [including labor] $200 - 400
N : decor [x 3 ] $75 - 1,200

Total : $11,605 - 34,425  + 15% turnkey design service

All of the items sure add up! Even at mid-range price points there is a large price range.  Most people are comfortable somewhere in this range for the "fit and finish" such as that shown here. Think about what is important to you and what would bring you the most joy, then prioritize accordingly. 

Up next, the cost of a brand new bathroom.

Blogatchalater!

Thursday, June 2, 2016

Y Design Loop : When to hire an interior designer to design your new kitchen vs. hiring a kitchen cabinet company

Over the years, I have come across many instances when a client wonders if they should hire an interior designer or kitchen cabinet company to design their new kitchen. 

image courtesy  Patricia Gray Interior Design

Without further ado, there are several differences [hopefully unbiased] I'd like to share with you :  


Value
Interior Designer
Kitchen Cabinet Company
Approach
Holistic, taking all adjacent areas, architectural features and your wish list into consideration
Usually limited to consideration of existing walls to determine where the kitchen cabinets and counters will go
Scope
Turnkey design includes everything e.g. floor plan [which may include new wall and doorway locations to correct inefficient space planning], lighting, flooring, tile locations, sizes and layout, paint colors, decor, appliance, fixture and furniture selections, and furniture layout, etc.
Designers make it a point to keep up-to-date with all new products available.
Design includes kitchen cabinet layout and cabinet wall elevations. The door style, material, and finishes options are chosen by you. Some companies may also offer tiles and plumbing fixtures.
Cabinet companies generally do not keep up-to-date with current market offerings, except for items related to cabinets [e.g. pantry pull-out shelving]
Service
Hands-on; work on and off-site.
Work mostly off-site. Project communications with the client are usually done through a sales rep.
Needs analysis
In-depth, on-going dialogue with you
Basic understanding what your wants and needs are
Experience
5-10 years experience is recommended for a complex room such as a kitchen
Often, a junior designer [0-5 yrs experience] will be assigned to do the design
Style
Unlimited style options, depending on your budget, architectural features and the style of the adjacent areas/rooms
Cabinet style is limited to whatever door options and box sizes are available
Budget
Design fees are extra – around 10-15% of the net cost, for turn-key full service.
A medium budget kitchen is between $50,000-75,000
Design fees are built into the price of the cabinets.
A ballpark price for 'semi-custom'* cabinets in a medium size kitchen is between $20,000-25,000
How does it work?
Approved design drawings are given to the general contractor in order for them to get quotes on everything, including pricing from a kitchen cabinet company. The quotes are then reviewed by the designer for accuracy and presented to you for approval
The kitchen cabinet company uses their own design drawings in order to give you a quote on the cabinets and counter
End Result
A stunning, cohesive, unique kitchen which is tailored to suit your lifestyle, budget and the style [or future style!] of the rest of the house
A nice basic kitchen which may have visual flow with adjacent rooms
This option may be right for you if :
- you enjoy collaborating one-on-one with a trained professional
- you have specific space planning needs which may require walls, ceiling and doorways to be changed
- you appreciate that the time and effort put into a project will result in an exceptional kitchen you are delighted to be in.

- you are planning on moving soon and do not want to invest in a specialized product
- you have an existing kitchen layout that doesn't require any new construction
- you are comfortable choosing lighting, materials, colors and styles that suit the rest of your home
- you are on a tight budget


* by semi-custom, I mean that most kitchen cabinet company's products are limited to the door styles, materials and finishes options currently in their product offering. Unusual sizes, details such as inlay, and materials such as metal are done by a full-custom cabinet workshop and up-charged accordingly.

Blogatchalater.
Y

Thursday, April 21, 2016

Y Design Loop : Fifth Avenue Kitchen Retrofit

Kitchen Upgrades Need Not Cost an Arm and a Leg

Everyone knows that the kitchen is one of the most expensive renovations ... here is a great example of what can be done on a modest budget.  My client had already updated her counter tops to quartz and flooring to clear maple hardwood a year before. These 2 items can easily account for $6,000 - $8,000 of a renovation budget depending on amount of material and number of cuts required.  Here is the before photo :

Before

We gave her kitchen a fresh, clean look with open-back upper cabinets that show off the white fully-tiled wall and new hood vent. The cabinets are Baltic Birch plywood [ which has an interesting striped edge ], with a gloss white laminate lining the inner surfaces. :

After
Only the lower cabinet and pantry doors were changed, leaving the cabinet boxes as is. Another huge cost savings ! The ceiling light fixture was moved to the middle of the room, and pendants were added above the sink. The sink faucet was also replaced.

In total, these upgrades are in the $15,000 range for everything including new cabinet and pantry doors [not in photo], knobs, electrical, general contracting and design services.  If you want to update your kitchen, doing it in 2 phases like this is definitely a feasible option!


Design Tip :

If you are wanting to do any sort of renovation, it is wise to start your project at least 3-6 months ahead of time in order to secure an A-list contractor, and to ensure all new products and materials are available for installation. The very best contractors are booked anywhere from 3 - 12 months in advance!

Inspiration :

Sunbrella fabrics !  This company manufactures outdoor fabrics for use on furniture, draperies, awnings, pillows, etc.  It is made from 100% acrylic so it resists stains, fading and the elements.  And of course, the color and pattern range is amazing :


photo : Sunbrella

http://www.sunbrella.com/en_us/
https://www.instagram.com/sunbrella/

Blogatchalater!
Y

Tuesday, January 19, 2016

Y Design Loop : Richmond Road Living Room Re-design

Working with a Blank Slate : Richmond Road Living Room


Just completed in time for Christmas - the redesign of a living/ dining room in a west end Ottawa, condominium high-rise. The chairs were re-upholstered with Robert Allen Tapir fabric, the wallpaper is Crown Gold grass cloth, the fireplace is an electric Amanti, the tallboy was purchased by the clients and hand painted by 4 Walls, and the lighting is from Found Design Ottawa [quartz base lamps], Juno and Restoration Hardware .... who doesn't love a great before and after?


AFTER


BEFORE


Notice what a different new modern fabric makes to the clients' classic wing-back chairs.  The extra pieces were used for pillows.

Apple Red Bench
 

Warm up your home with a piece of red furniture ...


This is another example of what new upholstery fabric can do to an existing piece of furniture!  Here is a close-up of this really interesting fabric from one of my favorite companies, Maharam.  

It looks like a cross between snake skin and high school football jersey mesh...what a fabulous and unique combo.


And functionally, it's very durable for high use spaces such as this front foyer.

Stay cozy !


Tuesday, March 18, 2014

March's Top 3 Interior Design Tips : Easy Ways to Welcome Spring Into Your Home

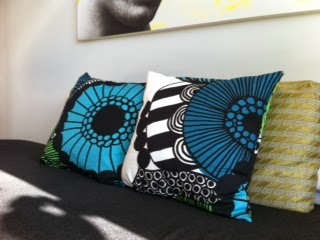
1] Buy some Marimekko pillows.


I recently discovered that EQ3 in Canada is selling products from this famous Finnish design company. How exciting and rejuvenating !

2] Paint something with a bright, unexpected color.


If you don't have the nerve, or the right furnishings to paint a whole wall, consider using bright colors on a smaller scale :

- inside a medicine cabinet
- wall above your kitchen cupboards
- window frame
- powder room ceiling
- closet shelves

3] Create a new focal point or vignette with your prize possessions.


- choose a wall with good sight lines, and uncluttered with electrical outlets, switches, architectural details, etc.

- center a piece of your furniture on the wall [can be a table, chair, credenza or a combination depending on the floor space you have]. It should be about 2/3 - 3/4 of the wall width.

- hang your artwork above, leaving some space around it to breathe and making sure it's large enough to fill the space without feeling crowded

- accessorize your furniture with your complementary collectables such as a lamp, sculpture, vases, bowls, etc. They may encroach on the space in front of your art, but not by too much.

- paint or wallpaper the wall to match

Enjoy and have some fun!

Blogatchalater!
Y


Monday, October 7, 2013

Rooms with Focal Points We Love

Hello, everyone! It’s Mari here. I'm so happy to be with you today to share a guest post from Arcadian Home blog. It's a fantastic place to find interior design inspiration including great decorating ideas for everything from beautiful folding screens to warm rugs for the floor. Today’s topic is all about focal points we love. I’ve brought along images of eight rooms with some of my favorite beautiful, interesting and sometimes unexpected visual points of interest. Please enjoy! Thanks to Yvonne for letting me visit for a bit. ~ Mari Focal Points Perhaps the focal point of a room design is in the eye of the beholder. One might say the fireplace and contemporary artwork above it combine to create a focal point or the lovely ceiling perhaps, but for me the fascinating couture art piece is what I’m drawn to in this gorgeous space. What catches your eye and holds your attention here? Focal Points We don’t often think of buffet lamps, even colorful ones, as focal points. But this chartreuse glass lamp is most certainly the most eye-catching element in this high-rise apartment vignette. I love the brilliant color and curvy shape. Focal Points An intriguing oval desk takes center stage in this beautiful home office. A soft slightly feminine Hermes botanical wallpaper provides a lovely backdrop for this unique desk created from a steel oil drum—a study in contrast. Focal Points Even with a beautiful color-drenched painting on the teal wall behind it, a long red Chesterfield sofa is definitely the focal point in this sophisticated living room. Focal Points The appealing texture of leather becomes the point of interest in this contemporary living room. Strips of leather have been used to create an eye-catching rug that defines the conversation area. Focal Points How about double doors with a beautiful metallic finish for a fascinating focal point in an entryway? It looks stunning with the delicate gold chair. Focal Points I love surprising focal points like decorative trays as art in the bathroom. This stylish bath with large glass enclosed shower and pretty glass tile wall below the wainscoting goes for the unexpected with a not so serious take on a gallery wall. Focal Points In the midst of an amazing city view, a black and white rug from Diane Von Furstenberg is still the focal point of this open-air dining room. It provides an anchor and beautifully defines the dining area. Images 1 | 2 | 3 | 4 | 5 | 6 | 7 | 8 What do you think of these interiors? Leave us your thoughts below and come by our blog for more home decor, foyer lighting, and interior inspirations. Blogatchalater ~Yvonne and Mari

Friday, July 5, 2013

Top 5 Tips : How to Make the Most of Your Initial Interior Design Consultation

Generally speaking, people who want an interior design consultation either a] just bought a house or condominium, and need help turning it into their home; or b] want to improve, update and refresh their existing home.  A lot of valuable ideas and information can be shared in as little as 1 hour, especially if the tips below are considered :

1]  Come prepared. Make sure you have a list of questions and concerns in priority sequence. Let your designer know in advance if you are looking for something in particular so they come prepared. For example, if you want to change the color of your bedroom, the designer will bring paint and possibly wallpaper samples.

2]  Have an idea of the styles/ colors/ objects you like [and dislike]. Start a file and have it on hand as a communication tool with your designer. Buy some magazines, scour the internet and save images that appeal to you. Don't think about it too much - this should be a "gut reaction" exercise without too much analysis at first.

3] Take lots of notes including brand and company name information your designer may give you. This information is very valuable as it probably took them many hours or even years [saving you many hours !] to find these brands/ suppliers/ contractors etc. and to research their competency/ reliability/ quality/ etc.

4] Determine some sort of budget for what you are trying to achieve. This will help the designer narrow down the choices for you, and propose things that are suitable.

5] Know your schedule and share this with the designer. Are you the type of person who wants to start a project quickly and get it done asap? Or do you prefer to take your time and think about all the options, sometimes spending 6 months to work on an overall design plan? Let your designer know your expected timeline, so they can advise you accordingly.

Ciao!

Monday, June 25, 2012

Top 5 Interior Design Faux Pas : Part 1


1. Too much brown. And in this case, too much matchy-matchy naugahyde :


2. Too much furniture....looks like the sofa could actually catch on fire !


3. Sofa at the end of a bed - are you really going to sit here ? Having your back to the bed is just bad Feng shui


4.  Furniture lined up along wall. It looks a little like a flea market don't you think?


5. Too much wood.


ok, this one has many other problems such as clutter, mismatching styles, collectables stuffed up to the ceiling...stay tuned for Part 2 in July !!

Blogatchalater,
YP

Wednesday, May 23, 2012

June's Interior Design Tips : How to Work with an Interior Designer on Your Home Improvement Project.

Let’s demystify the “Design Process”
Without a doubt, the prospect of a home improvement project can be exciting for some, and daunting for others. Naturally, questions abound such as : Who is responsible for what? What does it cost? Do I have to pay for everything at once? etc.
Alas, don’t despair…call a designer! Here is a synopsis of the Design Process which applies to the smallest project [like selecting powder room colors], as it does to a full-scale renovation.


Step 1 – collect your thoughts and bring them to your first meeting.
This is the beginning of the process to help your designer understand what you like, and generally what you are looking for. You will need to bring information about what you have including photos of the existing space, inspiration photos of what you want and your budget range.

Step 2 – your designer and you work together on the “Problem Definition”.
In addition to the above items, your interior design problem[s] will be discussed at the meeting. It could be as simple as “I need a smart way to display my beautiful ceramic collection”. Designing is all about identifying problems and resolving them through purposeful planning and selection of appropriate materials, size, color, construction, etc. Your designer’s first important job is to listen carefully and ultimately play it all back to you in the form of a “Project Proposal”.

Step 3 – your designer translates the project objectives into a “Project Proposal”.
A Project Proposal is a written document which states all information gleaned so far, as well as the proposed design schedule, design fee and how the “Design Concept” will be presented to you. Count on 10-20% of your total budget for the design fee (on the low side of the range for big projects, and the high side for small projects) or an hourly fee for smaller projects . Most designers will require about 1/3rd of their total fee as a retainer – but only after the Project Proposal has been reviewed and approved by you. This is your assurance that you and your designer are on the same page.


Step 4 – your designer works to create the “Design Concept”.
Based on all of your information laid out so far, designers will immerse themselves into your project to formulate a Design Concept. They will measure and photograph your space, conduct research, interact with contractors, suppliers and specialists (e.g. structural engineer, lighting designer, architect etc.) as required to explore the range of possible solutions. They will interact with you to hone their understanding of your likes and dislikes. Next they will draw, brainstorm, create, search, laugh, cry…and ultimately your designer will make qualified decisions and selections for you.
Depending upon the size and complexity of your project, the Design Concept may be presented in the form of computer generated 3D color drawings, 2D floor plans, hand drawn sketches, product brochures/specifications, material samples and more. Your designer will not proceed until you have had time to think about everything they have especially created for you.


Step 5 – refinement and finalization - your designer works to gain your approval!
After you communicate any changes you want, your designer will make the changes to the drawings and specifications. These documents form the “Design Drawing & Specification Package”. This package is used in many ways including to obtain quotes, calculate quantities and get a permit. Once completed and approved by you, the Design Concept is ready to implement !

Step 6 – implementation and realization ...
At this point, either you or your designer can do this. For projects of any complexity, we strongly recommend you retain your designer to implement and manage the project ...so they can handle everything [e.g. purchasing, hiring the contractor, resolving issues, doing paperwork!]. Additionally, they have a set of preferred contractors and suppliers (companies they have established relationships with and hence get better prices from), which ensures the smoothest sailing possible.


Step 7 – enjoy your beautiful new space!
Now it's time to sit down and revel in the beauty of your new space, while sharing the physically and emotionally uplifting benefits with your visitors, pleased with the time and money you have saved, and the great value you have created - all by virtue of your important decision to hire a designer to help you with your project!


Blogatchalater
- Yvonne

Tuesday, March 20, 2012

March's Top 3 Tips - Scale is Everything

What does scale mean and how is it relevant to your interior space ?
Scale has several meanings, but the one we are demonstrating here means size, especially in relation to surrounding objects and architecture :

Tip #1 : Increase the scale of an object to achieve drama and/or strong focal point for a room. 
Here is an over-the-top example, but you get the idea ! :


Tip #2 : Think Big to make a statement. 
Notice that not only the size but location of this chandelier is not something usually seen; but because of the similar scale [and color] to the surrounding furnishings it absolutely works ! Living room by our design guru Phillipe Starck :


Tip #3 :  Think small, but many.
But be careful because with small tiles on a large area, it is easy for a space [especially a small shower stall such as this one] to look waaaay too busy.  This designer chose one, simple, smooth, dark color mosaic tile with contrasting grout. It's the lines that create the texture and pattern, not the tiles themselves :


Blogatchalater ! 

Thursday, March 1, 2012

5 Big Blunders of 'Do-It-Yourself' Interior Designers

We can all appreciate the notion that do-it-yourself projects save money...that is the intention anyways. But do you really save money in the long run ? What is your time worth ? Do you have the expertise and time and patience to solve the myriad problems that will arise ?  If not, hire an interior design professional !  Here is a list of our top 5 Big Blunders of 'Do-It-Yourself' Interior Designers :


1] Not realizing you lack the time and knowledge to design for yourself.
The reason why designers charge, is because an awful lot of time, knowledge and experience goes into every project. Paradoxically, the simplest, most elegant designs probably took the most time to resolve all the issues and to select just the right materials and products.  Under-estimating the time it will take is eroded by the fact that you will have to do a lot of research for your project, knowledge that a designer would know from the get-go.


2] Half-hearted analysis of the design problem to be solved.
Designers tend to look at the bigger picture.  Is replacing the pedestal sink with a vanity really going to solve the problem of bathroom storage ?
For example, would you have thought of this bathroom storage solution? :


3]  Focusing too much on the money you will save now [e.g. on materials, design and labor] and not enough on other, longer term costs. Things such as correcting mistakes, replacing low durability materials, replacing inferior quality products or trendy products more frequently, and realizing a reduced return on investment can cost substantially more [i.e. money wisely invested into your property can provide you with a much greater ROI when you go to sell].


4] Making mistakes by not paying attention to planning and the [design drawing] details....
especially with things like flooring, trims, baseboards, counter tops and door swings which amateurs tend to overlook.

Without a plan [ideally a scaled floor plan, and an elevation if you are installing something on a wall], how do you know if what you have in your head translates into reality? How do you know everything will fit and exist harmoniously?


5] Focusing on style and comfort, instead of scale.
Most furniture stores are large, with high ceilings. But once you get that Eames lounge chair home, you realize it is way too tight in the corner by the doorway to your dining room.  Over-crowding, or widely separated pieces [bottom image] is one of the most common mistakes, overlooked by amateurs.


 Blogatchalater

Wednesday, February 15, 2012

February's Top 3 Interior Design Tips : How to Make a Design Statement with Your Ceiling

Quite possibly the most overlooked surface of all time - the humble ceiling.
1] Make bulkheads work for you by having them define a space :


2] Choose an amazing light fixture and paint color to make your ceiling pop :

3] Use finishes other than drywall :


Be creative with what you've got !


Blogatchalater...

Friday, January 20, 2012

January's Top 3 Interior Design Tips - How to Turn your Bedroom into a Boutique Hotel Bedroom

Do you ever dream about having a "boutique" [aka modern designed] hotel bedroom for your very own?  You deserve it ! Of course getting up and going to work may now become even more difficult.....

Tip #1 Make the headboard wall the focal point of the room.
Here is a random sampling from cheap and cheerful to ultra sophisticated :

Hotel Bo Bo in Buenos Aires, Argentina

The Modern Hotel, Boise, Idaho


Smyth Thompson Hotel, NYC

Tip #2 Make the Bed!


Mix up the textures on your bed and go for the highest quality possible. Think 600-thread count sheets in linen or Italian cotton.


Deck your bed out with as many pillows as possible, at least four sleeping pillows or other large European pillows, plus accent pillows to create a boutique hotel style cocoon.

Tip #3 Pay attention to your window treatments.


The reason why we sleep so well in hotel suites is because they use blackout blinds and draperies.


Draperies are another way of layering textures  whether you use blinds or draperies with blackout lining ... beauty follows function .

Sweet dreams.

Thursday, December 15, 2011

December's Top 3 Interior Design Tips - How to Prepare for Your Winter Hibernation

What, you're not thinking about interior design this month? Well we are ! So bookmark this for January as it's a good one.

Tip #1 - Move your furniture away from the wall and windows as much as possible [without crowding the pieces] so that warm air circulates around each piece :

Tip #2 - Add sparkle & warmth using lighting & candles - look at the the fabulous, playful reflections of this lighting :

Tip #3 - Treat yourself to a new lounge chair/ pillows/ wool or pony skin rug/ draperies, plants - anything that helps fluff and warm up the hibernation nest ....8-12 weeks can seem like an eternity without these comforts!

Blogatchalater and Merry Merry ! xo